Why Recording Music at Home is Amazing
Recording music at home is not only fun but also super empowering. You get to create your tunes in your comfort zone, save money, and explore your creativity without any pressure. Whether you’re a beginner or an experienced artist, knowing how to record music at home opens up endless possibilities.
1. Setting Up Your Home Studio
Before you start recording, you need the right setup. Don’t worry—it doesn’t have to be expensive.
Choosing the Right Space
Pick a quiet room where you can control the noise. Avoid spaces with echoes, like kitchens or bathrooms. A carpeted room with furniture is ideal as it absorbs sound better.
Essential Equipment
Here’s what you’ll need to get started:
- Microphone: A good-quality condenser microphone works best.
- Audio Interface: Connect your microphone and instruments to your computer.
- Headphones: Use closed-back headphones for accurate monitoring.
- DAW (Digital Audio Workstation): Software like GarageBand or Audacity is beginner-friendly.
By setting up these basics, you’re already halfway to recording music at home.
2. How to Prepare Your Recording Space
Soundproof Your Room
Use foam panels or blankets to reduce external noise. Even curtains can work in a pinch!
Organize Your Gear
Keep cables untangled and your equipment easily accessible. This saves time and keeps you focused on recording.
Test the Acoustics
Clap your hands in the room and listen for echoes. If you hear any, add more soft materials like cushions or rugs.
Setting up your recording space correctly can make your music sound polished from the start.
3. Choosing the Right Microphone
Record Music at Home, your microphone is your best friend.
Types of Microphones
- Dynamic Microphones: Great for live vocals and instruments like drums.
- Condenser Microphones: Perfect for studio vocals and acoustic guitars.
Placement Tips
Place your microphone at the same height as your mouth or instrument. Use a pop filter to reduce harsh sounds like “P” and “S.”
With the right microphone, your recordings will sound clear and professional.
4. Understanding Digital Audio Workstations (DAWs)
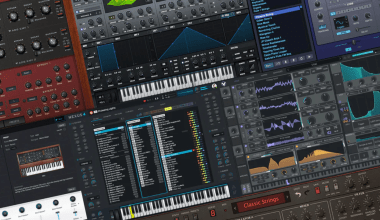
A DAW is software where you record, edit, and mix your music.
Popular DAWs for Beginners
- GarageBand: Free and user-friendly for Mac users.
- Audacity: Free and works on all platforms.
- Ableton Live: Great for electronic music.
Tips for Using a DAW
- Learn basic shortcuts to save time.
- Experiment with effects like reverb and equalizer to enhance your sound.
Your DAW is the powerhouse of your home studio, so take time to master it.
5. Recording Your Vocals at Home
Warm-Up Before Singing
Always warm up your voice to avoid strain and improve performance.
Use a Pop Filter
This small tool makes a big difference by reducing popping sounds in your vocals.
Record Multiple Takes
Don’t settle for the first take. Record a few and choose the best one later.
Proper vocal recording techniques ensure your music sounds smooth and professional.
6. Recording Instruments at Home
Acoustic Instruments
Position your microphone close to the instrument but not too close to avoid distortion.
Electric Instruments
Use a direct input (DI) box to connect electric guitars or keyboards to your audio interface. This reduces noise and improves sound quality.
Layering Tracks
Record each instrument separately to give you more control during mixing.
7. Mixing and Mastering Your Tracks
Once you’ve recorded, it’s time to make your music shine.
Mixing
- Balance the volume of each track.
- Use equalizers to adjust the frequency of instruments and vocals.
Mastering
- Add a final polish to your track with mastering tools.
- Platforms like Deliver My Tune offer AI Mastering to make the process easy.
Mixing and mastering transform your raw recordings into studio-quality tracks.
8. Common Challenges and How to Overcome Them
Background Noise
Use noise reduction tools in your DAW to clean up your audio.
Lack of Inspiration
Take breaks and listen to other music for ideas.
Equipment Issues
Always check your gear before recording to avoid last-minute problems.
9. Sharing Your Music
Now that you’ve recorded and polished your tracks, it’s time to share them!
Platforms to Consider
- YouTube: Great for reaching a global audience.
- Spotify and Apple Music: Use a music distribution service like Deliver My Tune to get on these platforms.
Promote your music on Instagram, Facebook, and Twitter to grow your fanbase.
Sharing your music is the final step to building your audience and achieving success.
Conclusion: Start Recording Music at Home Today!
Record Music at Home is a rewarding journey that anyone can start. With the right setup, tools, and techniques, you can create professional-quality music without stepping into a studio. So, gather your gear, set up your space, and let your creativity flow!
For further reading, explore these related articles:
- How to Become a Music Publisher: Your Ultimate Guide
- Independent Music Publishing Companies: A Simple Guide for Artists
For additional resources on music marketing and distribution, visit Deliver My Tune.


