Why Your Microphone Setup Matters
A great microphone studio setup can make or break the quality of your recordings. Whether you’re a budding podcaster, musician, voice-over artist, or content creator, getting this right can save you time, effort, and frustration.
In this guide, we’ll walk you through every detail of setting up a professional microphone studio. We’ll discuss choosing the right microphone, arranging your space, acoustic treatments, and much more. Let’s dive in and make your dream studio a reality!
Choosing the Right Microphone for Your Studio
Types of Microphones and Their Uses
When setting up your microphone studio, choosing the right microphone is crucial. Here are the most common types:
- Dynamic Microphones: Great for live performances or recording loud instruments like drums and guitars.
- Condenser Microphones: Ideal for vocals and acoustic instruments due to their sensitivity and clarity.
- Ribbon Microphones: Perfect for vintage sound; commonly used in studio recordings.
Key Features to Look For
- Frequency Response: Ensure the microphone captures your desired sound range.
- Polar Patterns: These determine how sound is picked up. Options include cardioid (front-focused), omni-directional (360°), and bi-directional (front and back).
- Connectivity: USB mics are great for beginners, while XLR options are professional-grade.
Setting Up Your Studio Space
Find the Right Location
Start by picking a quiet spot with minimal external noise. A smaller room is often easier to treat acoustically than a large one.
Arrange Your Equipment
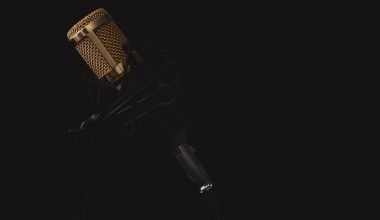
Position your microphone at ear level and consider these essentials for your setup:
- Mic Stand: Keeps the microphone stable and at the right height.
- Pop Filter: Reduces harsh plosive sounds.
- Shock Mount: Isolates the mic from vibrations.
Acoustic Treatment: The Key to Better Sound Quality
Why Acoustics Matter
Even the best microphone won’t sound good in a poorly treated room. Acoustic treatment improves clarity and reduces unwanted echoes.
Affordable Acoustic Solutions
- Foam Panels: Absorb mid and high frequencies.
- Bass Traps: Address low-frequency issues.
- Thick Curtains or Blankets: DIY options for soundproofing windows or doors.
Setting Up Your Recording Chain
Audio Interface
An audio interface connects your microphone to your computer, converting analog signals to digital. Look for interfaces with at least one XLR input and phantom power if using a condenser mic.
Cables
Invest in high-quality XLR cables to prevent signal interference.
Software (DAW)
Digital Audio Workstations like Audacity, GarageBand, or Pro Tools help you record and edit your audio.
Fine-Tuning Your Microphone Placement
Proximity Effect
Getting closer to the microphone enhances bass but can muddy your sound. Experiment with distance to find the sweet spot.
Angles Matter
Position the microphone slightly off-axis to reduce harsh sounds without sacrificing clarity.
Testing and Adjusting Levels
Gain Staging
Ensure your input levels are neither too low (noisy) nor too high (distorted). Aim for a signal peaking around -6dB.
Monitor with Headphones
Use closed-back headphones to hear exactly what the microphone captures.
Advanced Tips for a Professional Studio Setup
Multi-Mic Techniques
If you’re recording multiple instruments or vocals, learn about stereo mic techniques like X/Y or mid-side setups.
Backup Your Recordings
Invest in an external hard drive or cloud storage to prevent data loss.
Starting with a basic microphone studio setup is perfectly fine. Over time, as your skills grow, you can upgrade components like:
- A high-end condenser microphone.
- Studio monitors for better sound playback.
- Advanced acoustic treatment.
Conclusion: Build Your Dream Microphone Studio Setup
Creating a great microphone studio setup doesn’t have to be overwhelming. Start with the basics, focus on sound quality, and upgrade as you go. Remember, the right tools and setup can make all the difference in how professional your recordings sound.
By following these steps, you’re well on your way to achieving crystal-clear recordings, no matter your skill level. Happy recording!
For further reading, explore these related articles:
- Top 10 Love Songs of All Time: Tunes That Warm the Heart
- Famous Marathi Songs – A Melodic Treasure of Maharashtra
For additional resources on music marketing and distribution, visit Deliver My Tune.