Are you a music enthusiast dreaming of creating your own music studio at home? Whether you’re an aspiring producer, a budding podcaster, or simply a hobbyist, setting up a homemade music studio can transform your creative space into a professional playground. The good news is that building a music studio at home doesn’t have to break the bank. With careful planning and smart choices, you can create a functional, inspiring space that works perfectly for your needs.
In this guide, we’ll walk you through everything you need to know to build your very own homemade music studio. From picking the right room to choosing essential equipment, we’ve got you covered. Let’s dive in!
Why Build a Homemade Music Studio?
Having your own music studio at home means freedom—freedom to create whenever inspiration strikes. It eliminates the hassle of booking expensive studio time and allows you to work on your craft in a space that’s uniquely yours. Plus, a homemade music studio can save you money in the long run. Instead of paying hourly fees, you invest in your own equipment, which you can use as much as you want.
But it’s not just about the savings. A personal music studio provides you with the comfort and flexibility to experiment with your ideas without any external pressure. Whether you’re recording vocals, editing tracks, or just jamming out, the convenience of having a dedicated space is invaluable.
Step 1: Choose the Right Space
The first step in building your homemade music studio is finding the right space. While it’s tempting to use any available room, it’s important to consider a few key factors:
- Size and Shape: A medium-sized room with fewer parallel walls is ideal. Avoid small, square rooms if possible, as they tend to create unwanted sound reflections.
- Noise Levels: Pick a space away from noisy areas like the kitchen or living room. The quieter your room, the easier it will be to focus and record clean audio.
- Natural Light and Ventilation: While soundproofing is crucial (more on that later), having access to natural light and proper ventilation makes your studio more comfortable to work in.
Once you’ve found your spot, it’s time to make it your own. Transitioning a basic room into a functional music studio might seem challenging, but it’s totally doable with a little effort.
Step 2: Soundproof Your Studio
Soundproofing is essential for any homemade music studio. It keeps unwanted outside noises from ruining your recordings and prevents your music from disturbing others. Here’s how you can soundproof your space effectively:
- Seal the Doors and Windows: Use weatherstripping or acoustic foam around doors and windows to block out noise leaks.
- Add Acoustic Panels: Place foam panels or bass traps on the walls to absorb sound reflections. This reduces echo and creates a cleaner sound environment.
- Use Thick Curtains or Rugs: Cover hard surfaces with thick curtains or rugs to minimize sound bouncing around the room.
- Invest in a Door Sweep: A door sweep can help seal the gap under your door to prevent sound leakage.
Pro Tip: You don’t have to spend a fortune on soundproofing materials. DIY options like heavy blankets or mattresses can work wonders on a budget.
Step 3: Gather Your Equipment
No homemade music studio is complete without the right equipment. While it’s easy to get overwhelmed by the sheer number of options, starting with the basics is key. Here’s a list of essential gear:
- Computer: Your computer will serve as the heart of your music studio. Look for a reliable laptop or desktop with sufficient RAM and storage.
- Digital Audio Workstation (DAW): A DAW is the software you’ll use to record, edit, and mix your music. Popular options include Logic Pro, Ableton Live, and GarageBand.
- Audio Interface: An audio interface connects your instruments and microphones to your computer. It ensures high-quality sound input and output.
- Studio Monitors: Unlike regular speakers, studio monitors provide accurate, uncolored sound, which is essential for mixing.
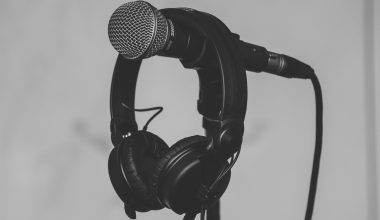
- Microphones: A good microphone is a must for recording vocals and instruments. Start with a versatile condenser mic.
- Headphones: Invest in closed-back headphones for tracking and open-back headphones for mixing.
- Cables and Accessories: Don’t forget XLR cables, pop filters, and mic stands.
Remember, you don’t have to buy everything at once. Start with the essentials and gradually upgrade as your skills and budget grow.
Step 4: Organize Your Space
Now that you’ve gathered your equipment, it’s time to set up your homemade music studio. Proper organization not only makes your space look neat but also improves your workflow. Here are some tips:
- Desk Setup: Place your computer, audio interface, and studio monitors on a sturdy desk. Keep cables organized with clips or zip ties.
- Comfortable Seating: A good chair can make long recording or editing sessions more enjoyable. Look for one with proper back support.
- Lighting: Use adjustable lighting to create a cozy atmosphere. LED strip lights can add a creative vibe to your studio.
- Decor and Inspiration: Add personal touches like posters, plants, or mood boards to keep you motivated.
Step 5: Learn the Basics of Music Production
Once your homemade music studio is ready, it’s time to learn the ropes of music production. If you’re new to the world of recording and mixing, don’t worry—there are countless free tutorials and courses available online. Start by mastering the basics of your DAW and gradually explore advanced techniques.
Practice makes perfect, so don’t be afraid to experiment. Whether you’re creating beats, recording vocals, or mixing tracks, the key is to keep improving with each session.
Step 6: Keep Upgrading Your Setup
Building a homemade music studio is an ongoing process. As you gain more experience, you’ll discover new tools and techniques that can enhance your setup. Keep an eye out for sales or second-hand equipment to save money while upgrading your gear.
Final Thoughts
Creating a homemade music studio is a rewarding journey. It’s not just about the equipment or the acoustics—it’s about building a space where your creativity can thrive. With patience and dedication, your studio can become the ultimate sanctuary for your musical ideas.
So, what are you waiting for? Start planning your homemade music studio today and turn your musical dreams into reality. Remember, the journey is just as exciting as the destination.
For further reading, explore these related articles:
- Master My Song for Free: The Ultimate Guide to DIY Mastering
- The Ultimate Guide to the Best Songs on TikTok Commercial Music Library
For additional resources on music marketing and distribution, visit DMT Records Private Limited.
