Creating a home recording studio can be exciting, especially when you love music and want to produce professional tracks from the comfort of your home. You don’t need a huge budget or a massive space to get started. With a little planning and creativity, you can set up a studio that suits your needs perfectly. Whether you’re a beginner exploring music production or a seasoned pro upgrading your workspace, these home recording studio setup ideas will inspire you. Let’s dive in!
Why Create a Home Recording Studio?
Before jumping into the setup ideas, let’s discuss why having a home recording studio is a game-changer.
- Save Money: Professional studios can be expensive to rent. A home setup allows you to record as often as you want without worrying about the cost.
- Flexibility: You can work on your projects whenever creativity strikes, day or night.
- Comfort: Working in your own space means you control the environment. You decide the vibe, lighting, and overall feel.
- Learning Opportunity: Having your studio allows you to experiment, learn new techniques, and grow as an artist.
Now that you know the benefits, let’s explore some great home recording studio setup ideas.
Step 1: Choosing the Right Space for Your Studio
The first step in your home studio journey is deciding where to set up. The right space makes all the difference in sound quality and comfort.
1.1 Find a Quiet Space
- Look for a room where external noise is minimal. It could be a bedroom, basement, or even a walk-in closet. Noise from traffic, neighbors, or appliances can affect your recordings.
- Tip: Use rugs, curtains, or soundproof foam to minimize noise.
1.2 Room Size Matters
- You don’t need a large room to start. Small rooms can work great for recording vocals, guitars, or podcasts. Just make sure the space isn’t too cramped.
- If you have a larger space, consider dividing it into zones: a recording area, a mixing desk, and a comfortable creative corner.
1.3 Control the Acoustics
Good sound quality starts with controlling reflections and echoes in your room.
- Use acoustic panels, foam, or even thick blankets to dampen sound reflections.
- Place panels behind your speakers and on walls where sound bounces off.
- Pro Tip: Corner bass traps help reduce low-frequency build-up in small rooms.
Step 2: Essential Equipment for Your Home Recording Studio
Once you have your space ready, it’s time to gather the essential equipment for your home recording studio setup.
2.1 A Computer or Laptop
Your computer is the heart of your recording studio.
- Choose one with a fast processor, enough RAM (at least 8GB), and sufficient storage.
- Popular options: MacBooks, PCs with Intel i5/i7, or AMD Ryzen processors.
2.2 Digital Audio Workstation (DAW)
A DAW is the software where you record, edit, and mix your music.
- Beginner-friendly DAWs: GarageBand (free for Mac), FL Studio, or Reaper.
- For advanced users: Pro Tools, Ableton Live, or Logic Pro X.
2.3 Audio Interface
An audio interface connects your instruments and microphones to your computer. It converts analog signals into digital data.
- Popular choices: Focusrite Scarlett 2i2, PreSonus AudioBox, or Behringer UMC22.
2.4 Studio Monitors
Regular speakers won’t cut it for music production. Studio monitors offer flat, neutral sound.
- Budget-friendly monitors: KRK Rokit, Yamaha HS5, or JBL 305P.
2.5 Headphones
Invest in high-quality headphones for accurate mixing and monitoring.
- Closed-back headphones for recording: Audio-Technica ATH-M50x.
- Open-back headphones for mixing: Sennheiser HD 650.
2.6 Microphones
Choosing the right microphone depends on what you plan to record.
- Dynamic mics: Great for vocals, podcasts, and live instruments (e.g., Shure SM58).
- Condenser mics: Perfect for studio vocals and acoustic instruments (e.g., Audio-Technica AT2020).
2.7 Pop Filter and Mic Stand
A pop filter reduces plosive sounds like “P” and “B”, while a mic stand keeps your setup stable.
2.8 MIDI Keyboard Controller
If you make beats or play virtual instruments, a MIDI keyboard will become your best friend.
- Options: Akai MPK Mini or Novation Launchkey.
Step 3: Setting Up Your Studio Like a Pro
Now that you have your equipment, let’s look at how to organize and set up your home recording studio efficiently.
3.1 Desk and Ergonomics
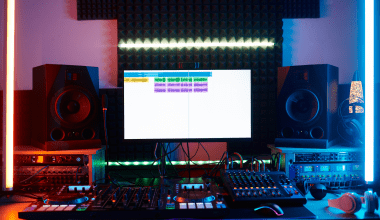
- Use a sturdy desk for your computer, monitors, and audio interface.
- Place studio monitors at ear level and form an equilateral triangle between your head and the speakers.
- Invest in an ergonomic chair for comfort during long sessions.
3.2 Cable Management
Messy cables can ruin the vibe of your studio.
- Use zip ties, Velcro wraps, or cable clips to keep wires organized.
- Label your cables for easy identification.
3.3 Lighting and Atmosphere
A creative environment enhances productivity.
- Use LED strips, fairy lights, or adjustable lamps to create a warm and inspiring atmosphere.
- Add personal touches like posters, plants, or artwork.
Step 4: Improving Sound Quality
A home recording studio setup isn’t just about equipment—it’s also about sound quality. Here are simple ways to improve your recordings:
4.1 Record in the Right Position
- Position your microphone a few inches away from the sound source.
- Record in a spot where echoes are minimal. Closets with clothes can act as makeshift isolation booths!
4.2 Use Reference Tracks
When mixing, compare your recordings to professional tracks. This will help you balance your sound.
4.3 Soundproofing on a Budget
- Use thick curtains, rugs, and furniture to absorb sound.
- Hang DIY acoustic panels using wooden frames, fabric, and insulation foam.
Step 5: Budget-Friendly Home Recording Studio Ideas
You don’t need to spend thousands of dollars to create a great studio. Here are some budget-friendly tips:
- Start Small: Begin with basic gear like a microphone, audio interface, and headphones. Upgrade as you go.
- DIY Solutions: Build your own acoustic panels or pop filters to save money.
- Look for Deals: Buy used equipment from reliable sources like Facebook Marketplace or eBay.
- Free Software: Use free DAWs or plugins to get started.
Final Thoughts on Home Recording Studio Setup Ideas
Setting up your own home recording studio is incredibly rewarding. You have the freedom to create music, podcasts, or any audio project at your own pace. Remember, you don’t need the most expensive gear to produce great results. Focus on finding the right space, getting essential equipment, and improving sound quality over time.
For further reading, explore these related articles:
- How to Record Vocals at Home: The Ultimate Beginner’s Guide
- How to Start and Succeed with a Music Record Label
For additional resources on music marketing and distribution, visit DMT Records Private Limited.


