Releasing your music on popular streaming platforms like Gaana is a great way to reach millions of listeners and grow your fan base. If you’re an independent artist or a band looking to expand your reach, learning how to distribute your single on Gaana is an essential step. Don’t worry; it’s easier than you think! In this guide, we’ll walk you through the entire process step-by-step so you can focus on what matters most – your music.
Why You Should Distribute Your Single on Gaana
Gaana is one of India’s most popular music streaming platforms, boasting millions of active users. Distributing your single on Gaana allows you to connect with music lovers across various genres. Whether you’re an indie artist, a budding rapper, or a classical musician, Gaana provides an excellent opportunity to showcase your talent to a wide audience.
By distributing your single on Gaana, you get the chance to:
- Reach a vast audience across India and beyond
- Monetize your music and earn royalties
- Improve your online presence and credibility
- Get discovered by potential fans and industry professionals
Now, let’s dive into how you can distribute your single on Gaana without any hassle.
Step 1: Prepare Your Single for Distribution
Before you start the distribution process, you need to ensure that your single is ready for release. This includes the following:
- High-Quality Audio: Make sure your track is professionally mixed and mastered.
- Metadata: Double-check your track’s title, artist name, and other details.
- Artwork: Create an eye-catching cover that meets Gaana’s specifications.
- File Format: Ensure your track is in the correct format (usually WAV or MP3).
Once everything is in place, you’re ready to move on to the next step.
Step 2: Choose a Music Distributor
Gaana does not allow independent artists to upload music directly. To distribute your single on Gaana, you’ll need to work with a music distribution service. Some of the popular distributors that can help you get your music on Gaana include:
- Delivermytune
- DistroKid
- CD Baby
- Ditto Music
- RouteNote
These platforms will not only help you distribute your single on Gaana but also on other major streaming services like Spotify, Apple Music, and Amazon Music.
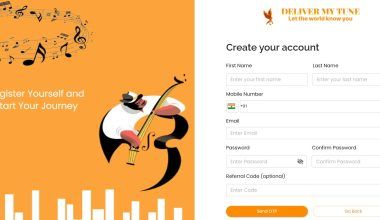
Step 3: Sign Up with Your Chosen Distributor
Once you’ve selected a distributor, the next step is to create an account with them. The process is usually simple and involves:
- Providing your artist details
- Adding your payment information
- Agreeing to the terms and conditions
After signing up, you’ll have access to their dashboard where you can start uploading your single.
Step 4: Upload Your Single
Now comes the exciting part – uploading your single for distribution. Here’s what you’ll need to do:
- Log in to your distributor’s platform.
- Select the option to upload a new release.
- Fill in all necessary details, such as:
- Track title
- Artist name
- Genre
- Release date
- Upload your audio file and cover art.
- Choose Gaana as one of the distribution platforms.
- Review all the details carefully before submitting.
Step 5: Set a Release Date
Setting a release date is crucial for maximizing your single’s impact. Give yourself enough time to promote your track before it goes live. Ideally, choose a release date at least two weeks from the submission date.
This will allow you to create buzz on social media, reach out to music blogs, and generate anticipation among your fans.
Step 6: Promote Your Single
Once your single is distributed to Gaana, it’s time to start promoting it. Here are a few effective ways to promote your track:
- Social Media: Share teasers, behind-the-scenes content, and countdowns.
- Music Blogs: Reach out to bloggers who feature music similar to yours.
- Playlists: Submit your track to playlist curators on Gaana.
- Collaborations: Work with influencers and fellow musicians to expand your reach.
- Live Performances: Organize virtual or physical gigs to showcase your music.
Step 7: Track Your Performance
Most music distributors provide analytics tools to help you track your single’s performance on Gaana. Keep an eye on important metrics such as:
- Number of streams
- Listener demographics
- Playlist placements
- Revenue earned
Analyzing these insights will help you understand your audience better and improve your future releases.
Step 8: Engage with Your Audience
Once your single is live on Gaana, don’t forget to engage with your fans. Respond to comments, share their posts, and create interactive content to keep them excited about your music.
Building a strong connection with your audience will help you grow your music career in the long run.
Conclusion
Distributing your single on Gaana doesn’t have to be complicated. By following these simple steps, you can make your music available to millions of listeners and take your career to the next level. Remember to stay consistent, promote your music effectively, and always engage with your audience.
Now that you know how to distribute your single on Gaana step-by-step, it’s time to take action and share your music with the world. Happy releasing!
Related Articles:
For further reading, explore these related articles:
- How to Release Your Single on YouTube Music Step-by-Step
- How to Release Your Single on YouTube Music in India: A Complete Guide
For additional resources on music marketing and distribution, visit DMT RECORDS PRIVATE LIMITED.


