Creating music from the comfort of your home has never been more accessible. With bedroom studio recording, artists of all levels can transform their ideas into polished tracks without needing a massive budget or a professional studio. But where do you start? In this guide, we’ll explore everything you need to know about turning your bedroom into a creative haven for recording.
Why Choose Bedroom Studio Recording?
Recording in a bedroom isn’t just about convenience; it’s also about control and cost. Professional studios can be expensive, and booking time can limit your creativity. With your own setup, you decide when and how to record. Plus, there’s something special about creating music in a space that feels uniquely yours.
Finding the Right Space in Your Bedroom
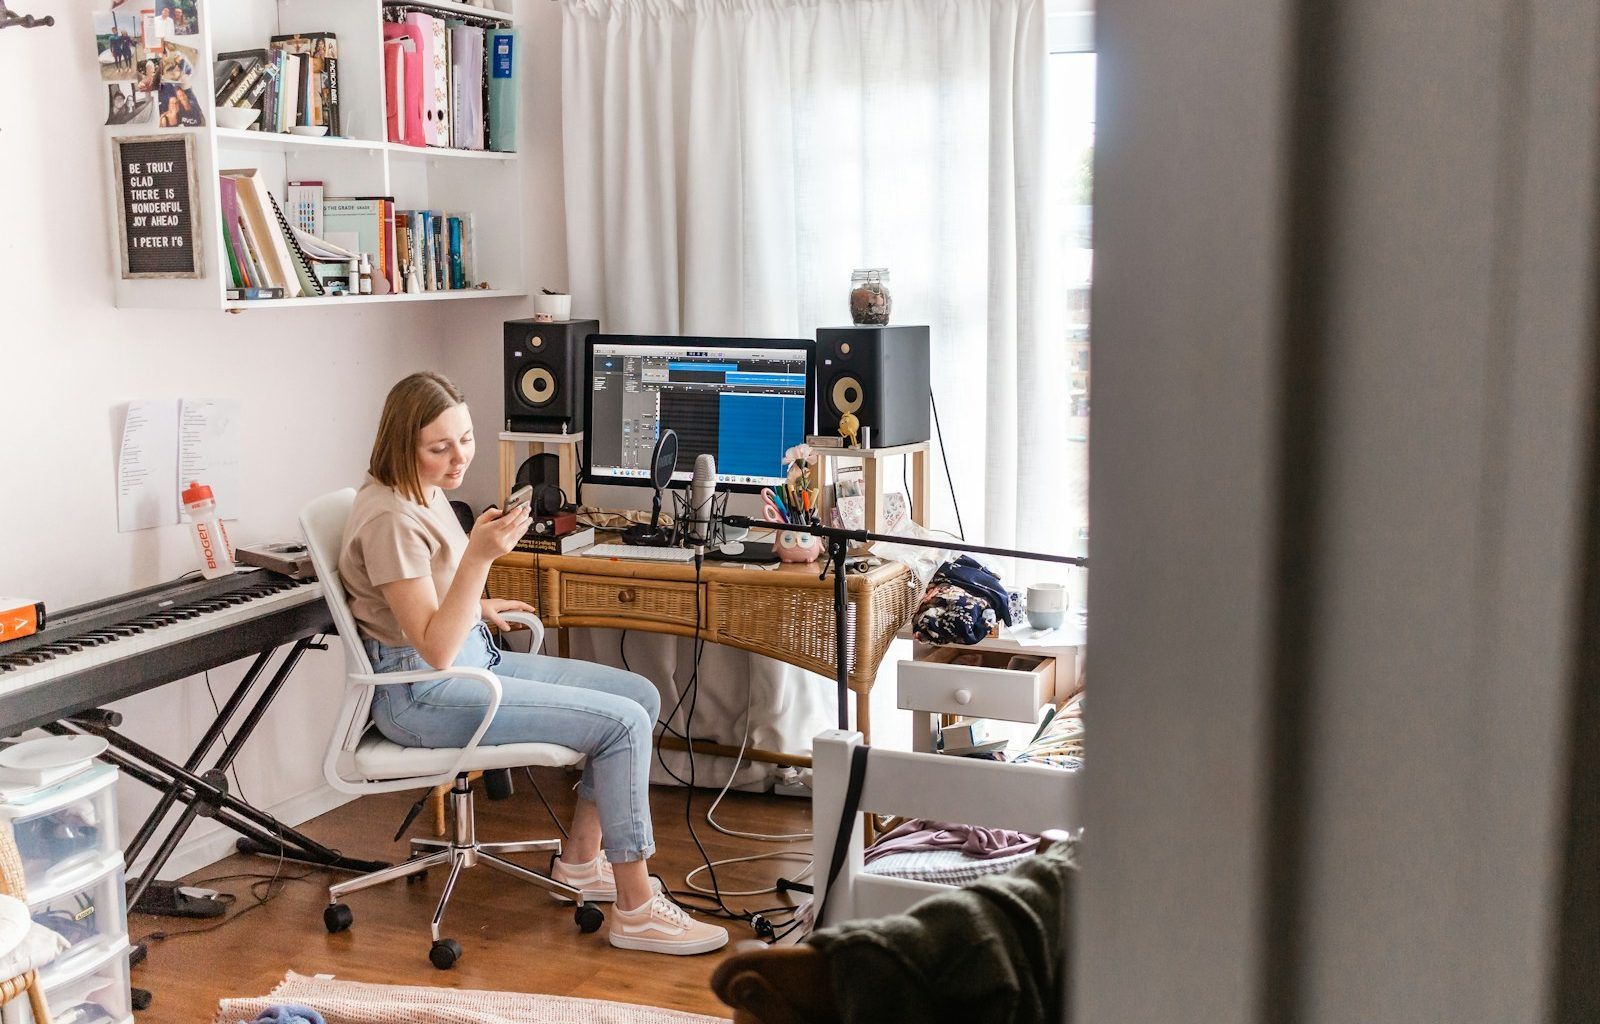
Not all bedrooms are created equal when it comes to recording. The first step is finding the best spot for your equipment. Look for an area that minimizes external noise and echoes. If your bedroom is small, don’t worry; small spaces can actually work in your favor when treated correctly.
Consider using a corner of your room as a starting point. Avoid placing your setup near windows or doors to reduce noise interference. And don’t forget to clear clutter—a clean workspace can do wonders for your focus.
Essential Equipment for Bedroom Studio Recording
You don’t need to break the bank to get started. Here’s a list of basic equipment every bedroom studio should have:
1. Computer
Your computer is the heart of your studio. Whether it’s a laptop or desktop, ensure it’s powerful enough to run digital audio workstation (DAW) software smoothly. Opt for a machine with at least 8GB of RAM and a fast processor.
2. Digital Audio Workstation (DAW)
A DAW is the software you’ll use to record, edit, and mix your music. Popular options include Ableton Live, FL Studio, and Logic Pro. Choose one that fits your style and workflow.
3. Audio Interface
An audio interface connects your instruments and microphone to your computer. Look for one with good preamps and low latency.
4. Microphone
Invest in a quality condenser microphone for vocals and acoustic instruments. If you’re on a budget, there are plenty of great entry-level options that deliver excellent sound.
5. Headphones and Monitors
Studio headphones are crucial for accurate sound monitoring. Closed-back headphones are ideal for recording, while open-back headphones are better for mixing. If your budget allows, consider adding studio monitors for a more balanced listening experience.
6. Cables and Accessories
Don’t forget the little things! You’ll need XLR cables for your microphone, stands, and pop filters to enhance vocal recordings.
Acoustic Treatment for Your Bedroom Studio
Sound quality is crucial in bedroom studio recording, and good acoustic treatment can make a significant difference. Start with these simple steps:
1. Control Reflections
Hard surfaces like walls and floors cause sound reflections that can muddy your recordings. Add foam panels, bass traps, and diffusers to absorb or scatter sound waves.
2. Use Rugs and Curtains
Soft materials like rugs and curtains can help dampen sound and reduce reverb. If you’re on a budget, thick blankets or carpets can work as makeshift solutions.
3. Seal Gaps
Block out external noise by sealing gaps around doors and windows. Use weatherstripping or heavy drapes to keep unwanted sounds out.
Setting Up Your Studio
Once you have your gear and acoustic treatment ready, it’s time to set up your studio. Arrange your equipment ergonomically to make recording sessions more comfortable. Place your desk against a wall to minimize reflections and ensure your monitors are at ear level for accurate sound.
Tips for Cable Management
Keeping cables organized is essential for a functional workspace. Use cable ties or Velcro straps to bundle wires and prevent tangles. Label your cables to save time during setup and troubleshooting.
Recording Techniques for Beginners
Now that your studio is ready, it’s time to dive into recording. Here are some beginner-friendly tips:
1. Proper Mic Placement
Position your microphone about 6-12 inches away from the sound source. Use a pop filter to reduce plosive sounds in vocal recordings.
2. Gain Staging
Set your input levels carefully to avoid clipping. Aim for a level that peaks around -6dB to leave headroom for mixing.
3. Record in Layers
Instead of trying to capture everything in one take, record each instrument or vocal part separately. This approach gives you more control during the editing process.
Mixing and Editing Your Tracks
Mixing and editing are where your recordings come to life. Use your DAW to:
- Balance the levels of each track
- Add EQ to enhance clarity
- Use compression to control dynamics
- Apply reverb and delay for depth
Take your time with this process, as a well-mixed track can make all the difference.
Overcoming Common Challenges
Bedroom studio recording isn’t without its challenges. Here’s how to tackle some common issues:
1. Noise Interference
Invest in noise-canceling headphones or record during quieter times of the day.
2. Limited Space
Use compact equipment and foldable furniture to make the most of your space.
3. Creative Blocks
Step away and take breaks when you feel stuck. Sometimes, a fresh perspective is all you need.
Final Thoughts
Bedroom studio recording is an exciting journey that empowers you to create music on your terms. With the right setup, techniques, and mindset, you can produce tracks that rival professional recordings. Remember, the most important thing is to keep experimenting and having fun. Your bedroom studio is your playground—let your creativity shine.
For further reading, explore these related articles:
- Mother Tribute Songs: Celebrating the Most Special Bond
- Kylie Minogue: A Journey Through Music, Fashion, and Inspiration
For additional resources on music marketing and distribution, visit Deliver My Tune.


