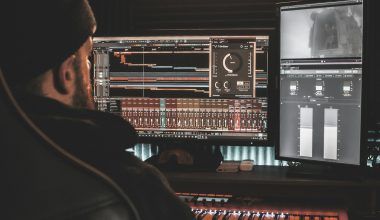
Creating music is a labor of love. After all the hard work you put into writing, recording, and mixing, there’s one final step that can make your track sound professional: mastering. But what if you don’t have the budget to hire a professional? Don’t worry! You can master your song for free, and this guide will show you exactly how to do it. Let’s dive in!
What Is Mastering and Why Is It Important?
Mastering is the process of fine-tuning your mixed track to make it sound polished, balanced, and ready for distribution. It ensures your song sounds great across all devices, from high-end speakers to earbuds. Essentially, mastering is the cherry on top of your musical creation.
Mastering may sound technical, but with the right tools and guidance, anyone can do it. And yes, you can do it for free. Let’s explore how.
Step 1: Get Your Mix Right
Before you even think about mastering, make sure your mix is as good as it can be. A poor mix will only amplify imperfections during mastering. Focus on balancing your levels, cleaning up frequencies, and ensuring each element of your track has its own space.
Some tips to perfect your mix:
- Use panning to separate instruments.
- Keep the bass and kick drum clean by removing unnecessary low frequencies from other tracks.
- Apply EQ and compression thoughtfully.
Remember, a great master starts with a great mix. The better your mix, the easier the mastering process will be.
Step 2: Choose Free Mastering Tools
Thankfully, there are plenty of free mastering tools available that can help you achieve a professional sound. Here are some of the best options:
- LANDR (Free Version): Offers a simple drag-and-drop interface.
- BandLab Mastering: An excellent, totally free online tool.
- iZotope Ozone Imager: A free plugin that helps with stereo imaging.
- Audacity: A free, open-source DAW with basic mastering tools.
These tools make it possible to master your song for free without compromising on quality. Download one or more to get started.
Step 3: Clean Up Your Track
Before applying any mastering effects, clean up your track. This includes:
- Removing Noise: Use noise reduction plugins or tools to eliminate unwanted background noise.
- Fading: Add fade-ins and fade-outs to create a smooth beginning and end.
- Normalize Levels: Ensure your track’s peak level is around -6 dB to leave headroom for mastering.
Step 4: Equalization (EQ)
Equalization is the foundation of mastering. It’s how you balance frequencies to make your track sound cohesive.
- Boost the low end (bass) for warmth and power.
- Highlight the midrange for clarity.
- Add brightness by increasing high frequencies.
Be subtle with your EQ adjustments. Less is often more when it comes to mastering.
Step 5: Compression
Compression ensures your song’s dynamics are consistent. This step helps balance quiet and loud sections, making the track sound even and professional.
- Set a low ratio (2:1 or 3:1) for gentle compression.
- Adjust the threshold so the compressor only engages during peaks.
- Use makeup gain to restore any lost volume.
Step 6: Stereo Imaging
Stereo imaging creates a sense of space and dimension in your track. Free plugins like iZotope Ozone Imager are great for this step.
- Widen the stereo field for instruments like synths and pads.
- Keep low frequencies (like bass) centered for a tighter sound.
Step 7: Limiting
Limiting is the final step in mastering. It increases the overall loudness of your track while preventing clipping. Use a free limiter plugin, such as the one included in Audacity or other free DAWs.
- Set the ceiling to -0.1 dB to avoid digital distortion.
- Gradually increase the input gain until your track reaches the desired loudness.
Step 8: Test Your Master
Once you’ve mastered your song, test it on different devices and in various environments. Play it on:
- Headphones
- Car speakers
- Smartphones
- Home sound systems
Take notes and make adjustments if necessary. Mastering is an iterative process, so don’t be afraid to tweak your settings.
Step 9: Compare to Reference Tracks
A great way to ensure your song is ready for release is to compare it to professionally mastered tracks in the same genre. Listen for:
- Overall loudness
- Frequency balance
- Stereo width
If your song stacks up well, you’re good to go!
Step 10: Save and Export
Finally, save your project and export your mastered track. Use a high-quality format like WAV for distribution and an MP3 for sharing on social media.
Bonus Tips to Master Your Song for Free
- Educate Yourself: Watch free tutorials on YouTube to refine your skills.
- Use Presets: Many free plugins come with mastering presets that can give you a head start.
- Collaborate: Share your track with friends or fellow musicians for feedback.
- Practice: The more you practice, the better you’ll become.
Conclusion
Mastering your song for free is entirely possible with the right tools and techniques. While it takes time and effort, the results are worth it. By following this guide, you’ll be able to polish your music and make it ready for the world to hear—without spending a single cent. So why wait? Start mastering your song today and share your art with confidence!
Remember, every great song deserves a great finish. With these steps, you can ensure your music sounds its best—all for free.
Related Articles:
For further reading, explore these related articles:
- What Is Billboard: Everything You Need to Know About This Music Giant
- Girls’ Best Songs of All Time: A Playlist That Every Girl Will Love
For additional resources on music marketing and distribution, visit DMT RECORDS PRIVATE LIMITED


