Spotify has become one of the most popular platforms for music lovers and creators alike. If you’ve ever wondered how to add your own music to Spotify, you’re not alone. This guide will walk you through everything you need to know, in the simplest terms possible. Whether you’re an independent artist, a band, or just someone experimenting with music, getting your tracks on Spotify is more straightforward than you might think.
Why Should You Add Your Own Music to Spotify?
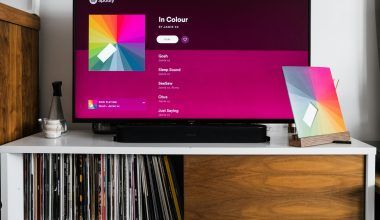
First things first, why Spotify? As a leading streaming platform, Spotify connects millions of listeners worldwide with music from all genres. By uploading your music, you’re opening the door to a global audience and countless opportunities. Plus, having your tracks on Spotify adds credibility to your portfolio as an artist. Imagine the thrill of telling your friends, family, and fans that your music is available on such a big platform!
Now let’s get started with the steps.
Step 1: Prepare Your Music
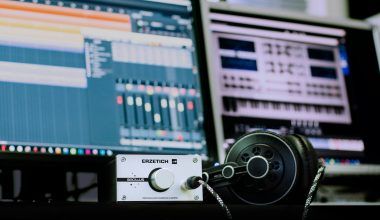
Before you think about uploading your music, you’ll need to ensure it’s ready for the world to hear. Here are some key points to consider:
- Quality Matters: Make sure your tracks are mixed and mastered professionally. High-quality audio will leave a better impression on listeners.
- File Format: Spotify requires your music files to be in WAV format, with a sample rate of 44.1 kHz and a bit depth of 16-bit.
- Album Artwork: Create eye-catching album art that represents your music. Spotify has specific requirements, like a resolution of 3000 x 3000 pixels and a file size under 20MB.
Once your music and artwork are ready, it’s time to move to the next step.
Step 2: Choose a Distributor
You can’t directly upload music to Spotify. Instead, you need a music distributor to act as a middleman. These distributors handle the technicalities, like formatting your files and ensuring they meet Spotify’s guidelines.
Popular Music Distributors:
- DistroKid: Known for its affordability and ease of use. Perfect for beginners.
- TuneCore: Great for artists who want more control over their music rights.
- CD Baby: A solid option for those looking for one-time payment plans.
- AWAL: Ideal for artists with a growing fan base.
Choose a distributor that fits your needs and budget. Most of them have simple sign-up processes and guides to help you along the way.
Step 3: Create an Account with Your Chosen Distributor
Once you’ve selected a distributor, create an account on their platform. This usually involves:
- Signing up with your email.
- Providing basic personal and payment information.
- Agreeing to their terms and conditions.
It’s important to read these terms carefully. Some distributors take a percentage of your royalties, while others charge a flat fee.
Step 4: Upload Your Music and Metadata
Now comes the exciting part! You’ll upload your tracks, album artwork, and metadata to the distributor’s platform. Metadata includes:
- Song title(s)
- Artist name
- Album name (if applicable)
- Genre
- Release date
Ensure all the information is accurate because this is what Spotify will display to listeners.
Step 5: Set a Release Date
Distributors allow you to set a release date for your music. This gives you time to build hype and promote your upcoming release. Choose a date that allows for at least two weeks of preparation. This also ensures Spotify has enough time to review and approve your tracks.
Step 6: Promote Your Music
Your music is on its way to Spotify, but the work doesn’t stop here. Promotion is key to reaching more listeners. Here are some effective strategies:
- Social Media: Share teasers, behind-the-scenes content, and countdowns on platforms like Instagram, TikTok, and Twitter.
- Spotify for Artists: Claim your Spotify for Artists profile. This lets you update your bio, add photos, and track your music’s performance.
- Collaborate: Work with other artists or influencers to expand your reach.
- Create Playlists: Include your tracks in playlists and encourage your fans to do the same.
Step 7: Track Your Performance
Once your music is live, keep an eye on its performance. Spotify for Artists provides valuable insights, like how many streams you’re getting and where your listeners are located. Use this data to plan your future releases and promotions.
Common Questions About Adding Music to Spotify
Do I Need to Pay to Upload My Music?
Yes, most distributors charge a fee. However, the cost varies depending on the service you choose. Some charge a yearly subscription, while others take a percentage of your earnings.
How Long Does It Take for My Music to Go Live?
It typically takes 3-7 days for your music to go live on Spotify, but this can vary depending on the distributor.
Can I Upload Cover Songs?
Yes, but you’ll need to secure the proper licenses. Some distributors, like DistroKid, offer cover song licensing as an add-on service.
Can I Make Money from My Music on Spotify?
Absolutely! Spotify pays royalties based on the number of streams your music receives. The more people listen, the more you earn.
Final Thoughts
Adding your own music to Spotify might seem daunting at first, but it’s a straightforward process when broken into steps. By preparing your music, choosing the right distributor, and promoting your tracks effectively, you’re well on your way to reaching a global audience.
Now that you know how to add your own music to Spotify, it’s time to take action. Start preparing your tracks today, and don’t forget to enjoy the journey. After all, every stream, like, and share brings you closer to your dreams as a musician!
Related Articles:
For further reading, explore these related articles:
- The Amazing World of Female Rock Stars
- Jack Black: The Funny, Musical, and Unstoppable Star We All Love
For additional resources on music marketing and distribution, visit DMT RECORDS PRIVATE LIMITED.